Why the Car Button Blinks Happily and the Door Still Does Not Move
Programming the garage button in your car usually goes the same way. You hold your remote next to the button in the mirror or the headliner, the little light starts flashing fast, you feel like it worked, and then you press it in the driveway and nothing happens. Most people try it three more times, then give up and clip the old remote back on the visor.
The car did learn something. It learned your remote. What it did not do is introduce itself to the opener. Every garage door opener sold in the United States for well over two decades uses rolling code, and a rolling code opener will not answer a new transmitter until you press the Learn button on the motor and then send it a signal from that transmitter. Skip that second half and the car is shouting into a room where nobody is listening.
This guide covers HomeLink, the built-in system in most cars, trucks and SUVs that have a garage button. It walks through the full sequence in the order it actually has to happen, how to read the indicator light, what to do when you have an opener with Security+ 2.0 and an older car, how to erase codes when you sell a vehicle, and the Florida conditions that make this harder than the owner manual suggests. If your handheld remote itself is not working, start with our guide to a garage door remote not working first, because HomeLink can only learn from a remote that transmits.
Before You Start: What You Need and Where the Learn Button Is
Five minutes of prep saves most of the frustration.
- A working handheld remote for the opener. HomeLink copies the frequency and signal type from your remote before it ever talks to the opener. Put a fresh battery in the remote first. A weak remote battery is the single most common reason the first half fails.
- The car parked outside the garage, facing the door. The door will move during the last step. Make sure the doorway is clear of people, pets and the car itself, and keep the engine off or follow your vehicle manual, since some vehicles need the ignition on for HomeLink to work. Never run the engine in a closed garage.
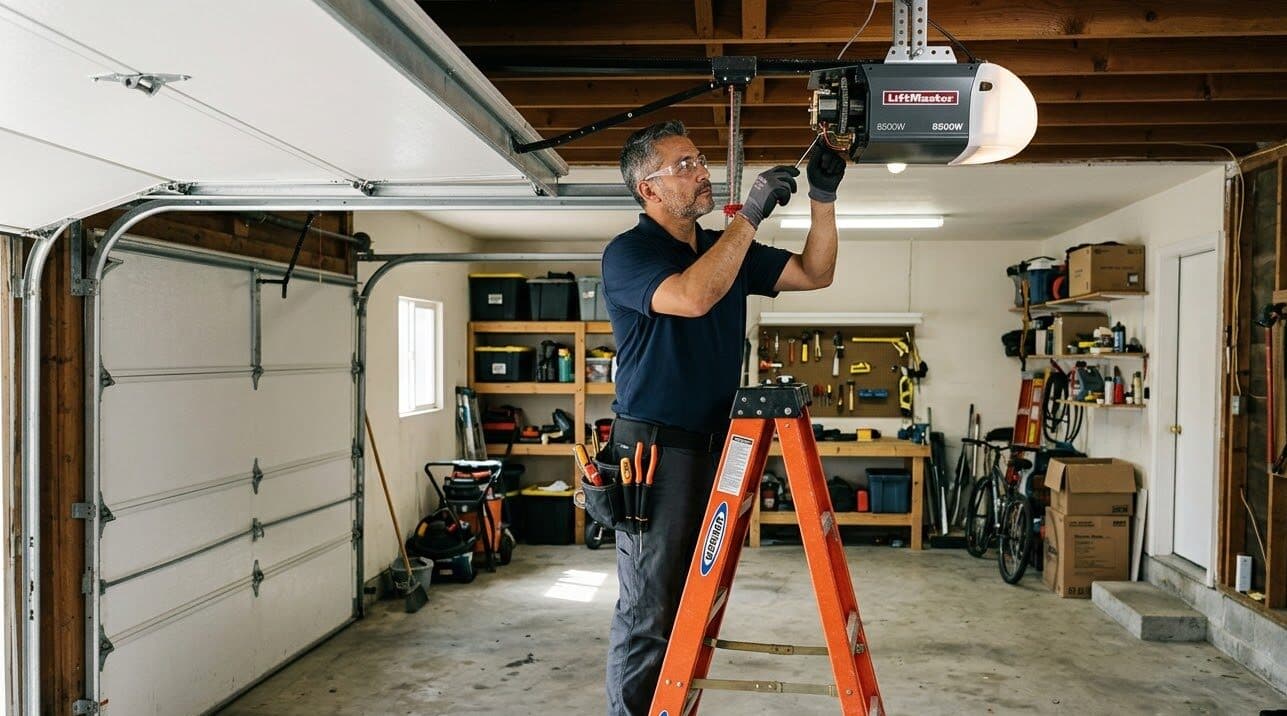
- A step ladder. The Learn button is on the opener motor head on the ceiling, usually on the back or side near the antenna wire or under the light lens.
- The color of the Learn button. On LiftMaster, Chamberlain and Craftsman openers, the color tells you the radio technology. Yellow means Security+ 2.0, which matters for older cars, as explained below.
- A second person, if you can get one. The Learn step has a timer of about 30 seconds. One person at the opener and one in the car makes it much easier.
How to Program Your Garage Door Opener to Your Car in 4 Steps
This is the standard HomeLink sequence, based on the official HomeLink training instructions that vehicle makers publish. Button names and light colors vary slightly by car brand, so keep the owner manual handy for your model.
- Step 1: Train the car to your remote. Hold the handheld remote 1 to 3 inches from the HomeLink button you want to use. Press and release the HomeLink button, then press and hold the button on the remote. Watch the HomeLink indicator. Within about a minute it should change from a slow blink to either a rapid blink or a steady light. If nothing changes, try pressing and releasing the remote button every 2 seconds instead of holding it.
- Step 2: Test the button. Press and hold the HomeLink button you just trained for about a second. If the door moves and the indicator stays steady, you have an older fixed-code opener or a system that does not need the next step, and you are done. On almost every opener made in the last 25 years, the door will not move yet, and the indicator will blink rapidly. That rapid blink means rolling code, so go to Step 3.
- Step 3: Press the Learn button on the opener. On the motor head, press and release the Learn button. Do not hold it. On most LiftMaster and Chamberlain openers, holding the Learn button for several seconds erases every remote and keypad paired to the opener. A single press starts a pairing window of about 30 seconds, usually shown by a lit Learn LED.
- Step 4: Send the car signal within 30 seconds. Get back to the car and press and hold the programmed HomeLink button for about 2 seconds, then release. Repeat up to three times if needed. When the opener learns the car, the door moves or the opener light flashes. Press the HomeLink button once more to confirm the door operates.
That is the whole process. The mistake almost everyone makes is stopping after Step 1 because the light changed. Step 1 only means the car learned your remote. Steps 3 and 4 are what teach the opener to trust the car.
Reading the HomeLink Indicator Light
The indicator in the mirror or headliner tells you where you are in the process.
| What the light does | What it means | What to do next |
|---|---|---|
| Slow blink after you press the HomeLink button | The button is in training mode, waiting for a remote signal | Hold the remote 1 to 3 inches away and press its button |
| Rapid blink after training | The car learned a rolling code signal | Go to the opener and press the Learn button, then send the car signal within 30 seconds |
| Steady light after training | The car learned a fixed code or a signal that needs no further step | Test the button. If the door moves, you are done |
| No change after about a minute | The car did not pick up the remote signal | Replace the remote battery, change the distance, or try pressing the remote every 2 seconds |
| Rapid blink every time you press the button, door does not move | The opener has not learned the car yet | Repeat the Learn button step. If it still fails, check compatibility below |
Security+ 2.0 Openers and Older Cars
LiftMaster and Chamberlain openers with a yellow Learn button use Security+ 2.0, a newer radio technology that many openers installed in Polk County homes over the last decade use. Older vehicles built before HomeLink added support for it cannot talk to those openers directly. You can train the car perfectly and the opener will still never respond.
The fix is a small device called a HomeLink repeater kit, sold by LiftMaster as the 855LM. It plugs in near the opener, listens for the older HomeLink signal and retransmits it in a format the Security+ 2.0 opener accepts. It is commonly used with LiftMaster, Chamberlain and Craftsman openers manufactured after 2011 with the yellow Learn button, and it resolves compatibility for many vehicles built before about 2012.
Other opener brands have their own compatibility notes. Genie openers use Intellicode rolling code, and the programming sequence at the powerhead differs from LiftMaster. Our guide to programming a Genie garage door remote covers the Genie side. For any brand, HomeLink publishes compatibility information by vehicle and opener on its own site, and it is worth checking before you buy a repeater.
How to Erase HomeLink When You Sell or Trade In a Car
A HomeLink button that still opens your garage is a key to your house. Before you sell a car, trade it in or return a lease, erase it.
- Erase all HomeLink buttons. On most vehicles, press and hold the two outer HomeLink buttons until the indicator changes, which takes about 10 to 20 seconds depending on the manufacturer. Toyota, for example, specifies about 10 seconds, and some Ram manuals say up to 20. Release when the light changes.
- Reprogram a single button without erasing the others. On many HomeLink versions, pressing and holding one button for about 20 seconds puts it back into training mode while leaving the other buttons alone. Check your manual, because this varies by model year.
- Remove the car from the opener too. Erasing the car protects you from the next owner of the vehicle. It does not remove the car from your opener memory. If you bought a house and do not know which cars were paired to the opener, clear the opener memory and reprogram your remotes, keypad and cars. Our guide to resetting a LiftMaster garage door opener covers the full erase.
Troubleshooting: When HomeLink Still Will Not Open the Garage
If you have done all four steps and the door still does not move, work through these in order.
- The remote battery is weak. HomeLink copies the signal strength it receives. A remote that works from the driveway on a strong battery can still be too weak to train a car when the battery is marginal. Replace it and try again.
- The Learn window closed. Thirty seconds goes fast when you are climbing down a ladder. Have someone sit in the car and press the HomeLink button as soon as you press Learn.
- You held the Learn button too long. On many openers, holding Learn erases the memory. If your remotes and keypad stopped working after you programmed the car, that is what happened. Reprogram them one at a time.
- The opener memory is full. Openers store a limited number of remotes and keypads. Older transmitters from previous owners fill the slots. Erasing the memory and reprogramming only what you use clears space.
- Compatibility. A yellow Learn button and an older car is the classic mismatch. A repeater kit usually solves it.
- Radio interference. LED bulbs in the opener, some smart home devices and nearby transmitters can shorten radio range. If the handheld remote only works close to the door, the problem is interference or the receiver, not HomeLink.
- The opener receiver is failing. If the wall button works but no wireless device will pair after a full erase, the receiver board or logic board may be the issue. That is an opener repair job rather than a programming one.
Why Florida Makes Car Programming Harder Than It Should Be
Polk County conditions do not change the steps, but they change how often you end up repeating them.
- Heat inside the car. Cabin temperatures in a parked car in a Florida summer climb far above outdoor temperatures. Heat is hard on remote batteries and the electronics clipped to a visor, which is one reason built-in HomeLink tends to outlast visor remotes. It also means a remote stored in the car may be too weak to train from.
- Hot garages. Attached garages in Lakeland and Winter Haven routinely run well above outdoor temperatures in summer. Opener logic boards are electronic parts that age faster in heat, and a failing receiver often shows up first as shortened range.
- Lightning and power surges. Central Florida has frequent lightning, and a surge can damage opener electronics. After a storm, if every remote and the car stop working at once but the wall button still works, suspect the receiver. A surge protector at the opener outlet is cheap insurance.
- Hurricane season power outages. Programming lives in the opener memory and usually survives an outage, but an opener that loses power repeatedly or is on a battery backup that fully discharges can behave oddly. Test the car button after power comes back.
HomeLink, myQ and Other Ways to Open the Garage From Your Car
HomeLink is a radio transmitter built into the car. It works without Wi-Fi or a phone, and it keeps working when the internet is down. Some newer vehicles also offer app-based garage control, and many homeowners add a smart opener or a Wi-Fi hub so they can check whether the door is closed from anywhere. These are complementary, not replacements. Radio control is instant and local. App control adds status and remote access but depends on your network.
If you want both, a smart garage door installation can add app control and door status without giving up the car button. The app side for LiftMaster and Chamberlain openers runs through myQ.
When to Call a Pro Instead
Programming HomeLink is a DIY job most of the time. Call when one of these is true: there is no Learn button on your opener, which means it predates the technology and no car will pair with it; nothing wireless will pair even after a full erase, which points at the receiver; or the door reverses, stops partway or refuses to close during testing, which is a force, limit or sensor issue and a safety matter.
Rocket Garage Door Services works Lakeland, Winter Haven, Haines City, Bartow and the rest of Polk County. Remote, keypad and car pairing is covered under opener and remote programming, and homeowners in Lakeland and Winter Haven can usually be scheduled within a day or two.